Aside from the practical barriers they provide to dogs, deer and other unwanted critters, fences can help set the character of a garden or yard. Many fences can be installed relatively easily and painlessly, even if you’re not a contractor. They can also be installed fairly economically. Pre-made fence kits are one option, but you can also make your own. The following is a step-by-step guide to installing a wooden fence.
First: Choose a Fence Type
Fences range from barrier, to privacy screen, easy to build, to picket, to basket weave. Barrier fences do just that, keep things out and in. They are easy to build but are often rather plain and offer little privacy. Adding shrubbery can help fill in the aesthetic gaps of these types of fences. Privacy fences can be built as tall as desired and out of a plethora of materials. Easy to build fences tend to follow a formula of top, bottom and center rail construction, but the rail treatments can be where variety is added. Picket fences are easy to build and easy to be creative with. Sloping terrain is most often the site of basket fences.
Second: Decide on Spacing for Fence Posts
The first step is to determine the distance you want between each fence post. The normal amount of space is six to eight feet. Corner posts are the first to be set. Stretching a line from corner post to corner post is the best way to mark a guide while you work. Carefully mark the precise point you’d like each post hole to be dug.
Third: Prepping Holes and Posts
About one-third of each post should be buried in the ground, when you set the fence posts, to ensure they can sustain the heavy weight and high winds they might be exposed to. A post-hole digger is the best way dig these. A wood preservative is the best way to protect the wood that is buried from to or degradation.
Four: Setting the Posts
Before placing a post into position, place two to three shovels’ worth of gravel at the bottom of each post hole. To ensure the post is plumb, use a level. Brace each post with a stake, after they are properly aligned. Once this is done, fill in the hole with dirt, and tamp it to pack the dirt down. Be mindful of moving the post alignment during this process.
My Saturday morning building wooden fence helping out pops pic.twitter.com/v2cebl6BL1
— jaysmooth (@harris_javaris) February 28, 2016
Five: Attaching Rails to Fence Posts
At this point, you’ll attach a top and bottom rail to each fence post. A “butt joint” can be used to secure a rail to the body of the post instead of securing it to the top. Also, you want to take measurements of the bottom and top rails to make sure they are correctly aligned.
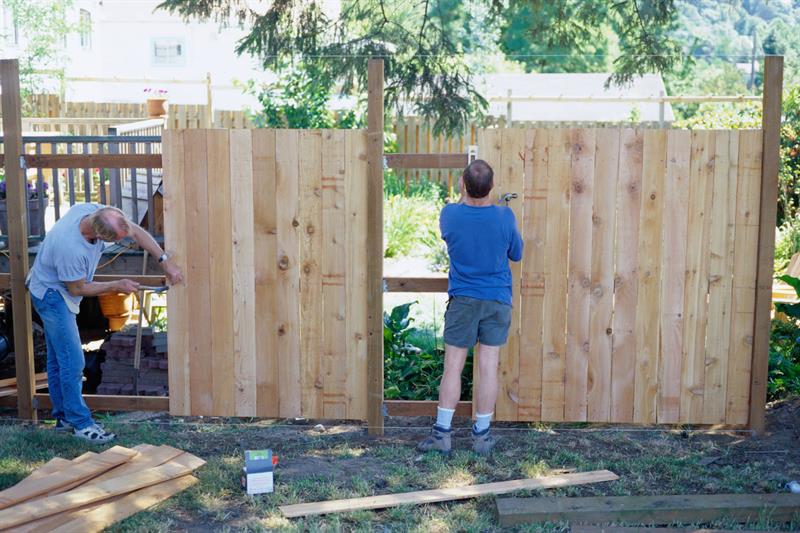
Six: Installing Fence Boards
This is how to install fence boards for a simple board fence. Fix the first board, at one fence post corner. Making sure the board is vertical (using a plumb level is recommended), nail the board into place. Choose another fence post corner and fix that board into place. Then place a string line at the top of each board and place a second board against the first one. Nail this in place and continue this process until each board is properly installed. Check that the boards are plumb and adjust accordingly, at about each 10 boards or so.